You can request access from our customer support using the subject “Sellvio AI Webmester (MCP) request”. After your request, we will email you the two details needed for the connection: the connector name and the MCP server address (URL).
Important: treat the MCP server address like a password and do not share it with third parties. Every call made through the connector is logged.
Follow whichever of the two guides below matches the AI assistant you use. You can also set up both at the same time.
Setup in Claude
The connector can be added the same way on the claude.ai website and in the Claude desktop app. With a free Claude account you can use one custom connector; paid plans allow several.
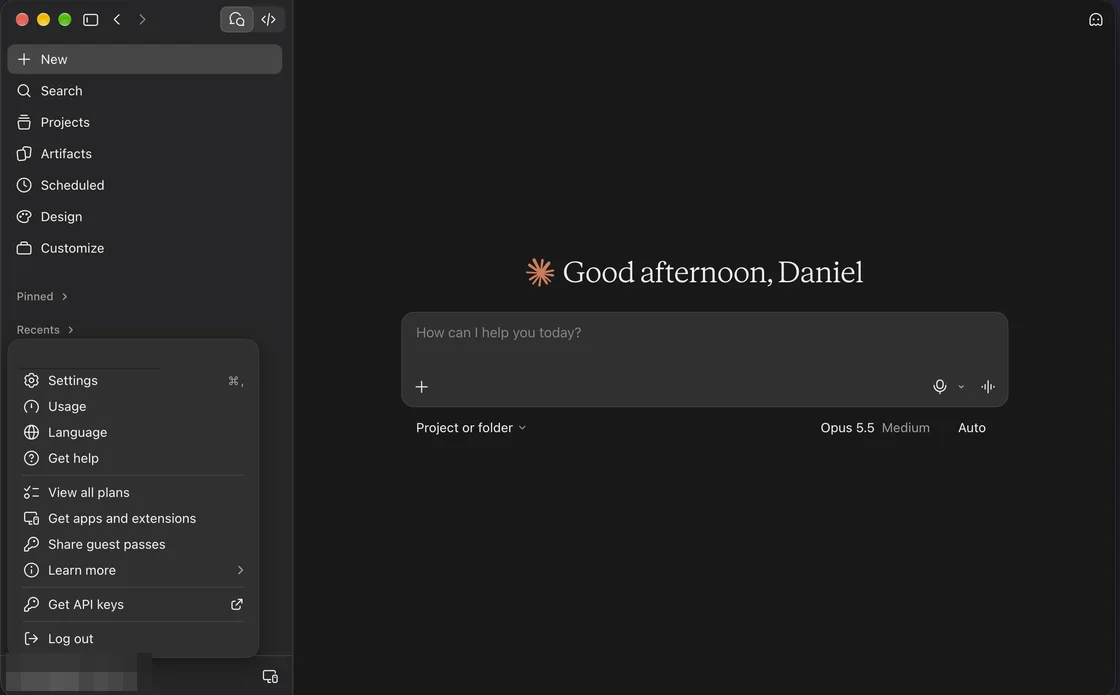
1. Open the settings. In the bottom left corner, click your name, then click Settings in the menu.
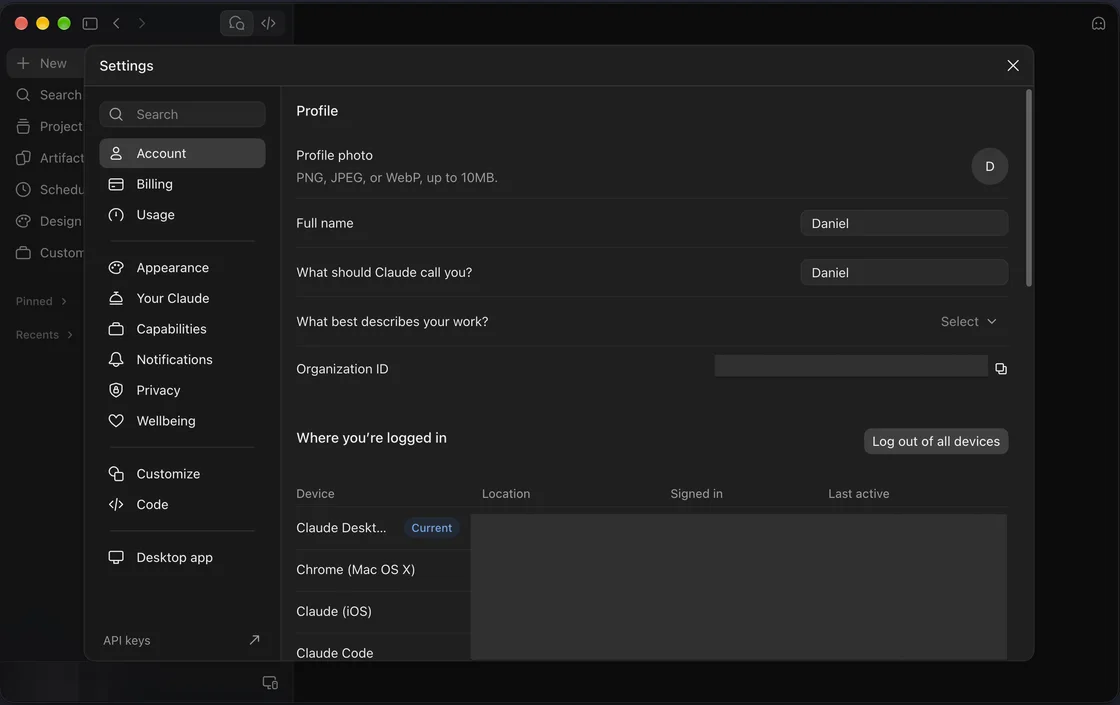
2. Select the Customize menu item. You will find it in the list on the left side of the settings.
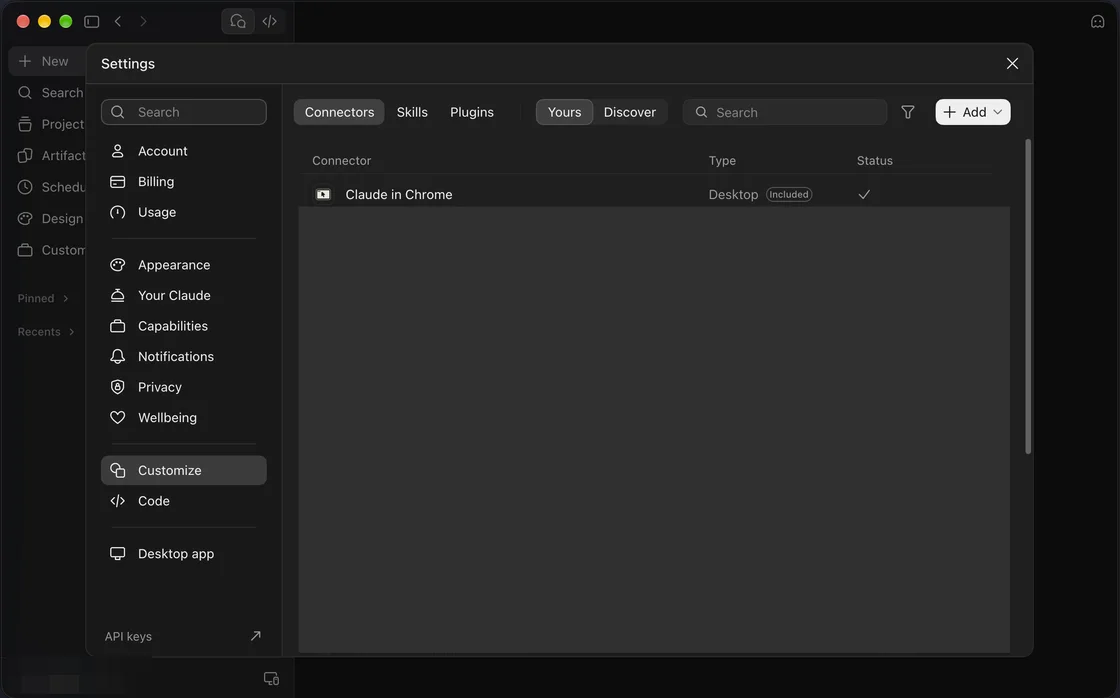
3. Start adding a new connector. On the Connectors tab, click the + Add button in the top right, then choose Custom → Web.
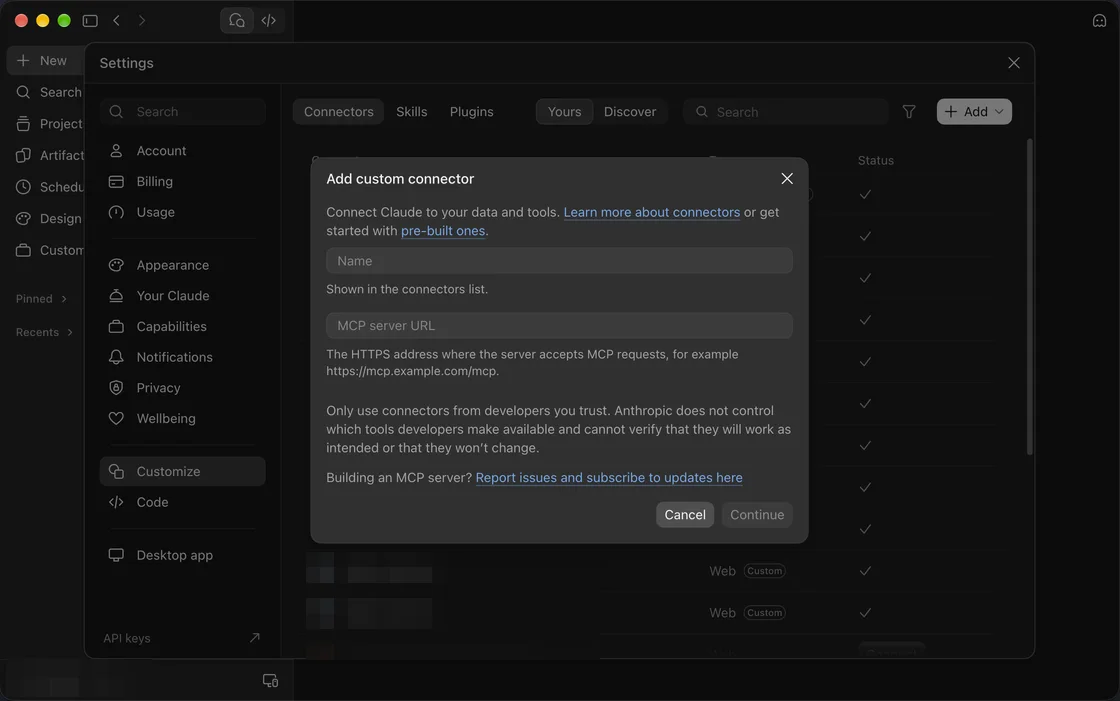
4. Enter the two details. In the Name field, enter the connector name you received by email; paste the MCP server address into the MCP server URL field, then click Continue.
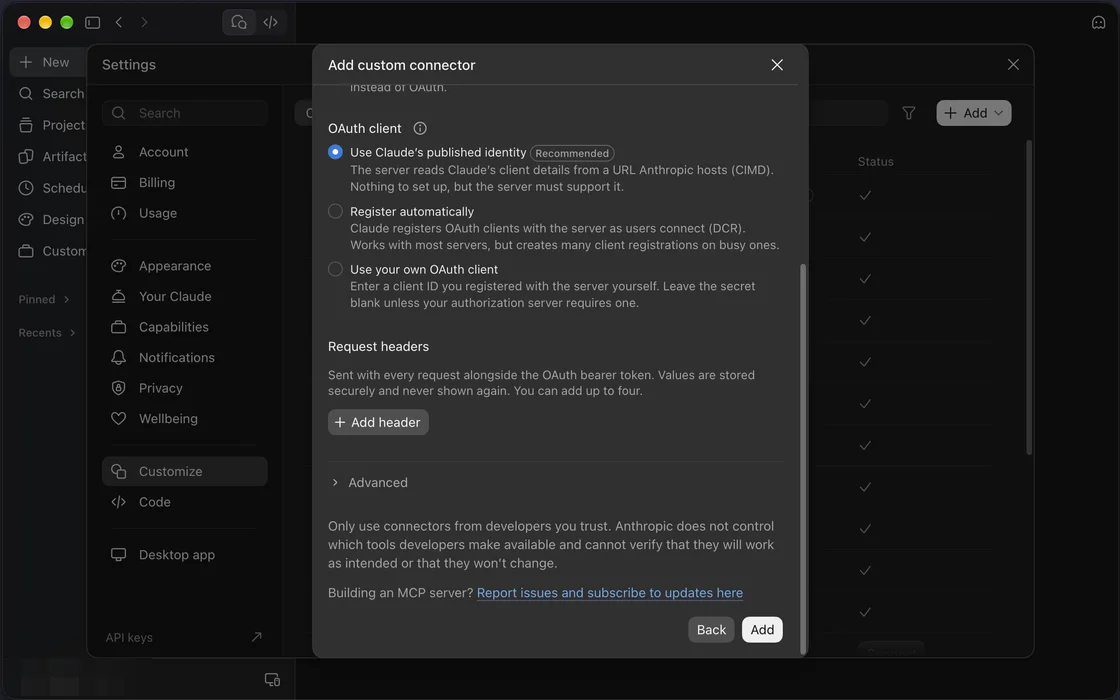
5. Keep the default settings. Under OAuth client, leave “Use Claude's published identity” selected, leave the Request headers section empty, then click the Add button.
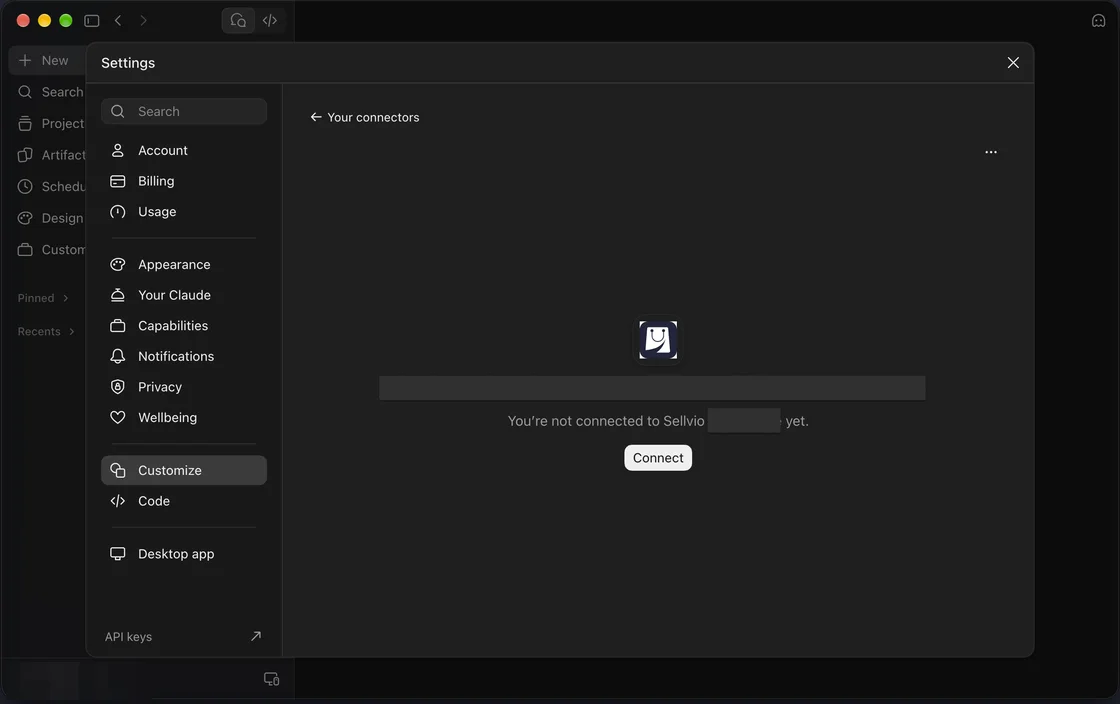
6. Connect to your webshop. The new connector appears in the list. Open it, click the Connect button, and approve the access on the page that opens.
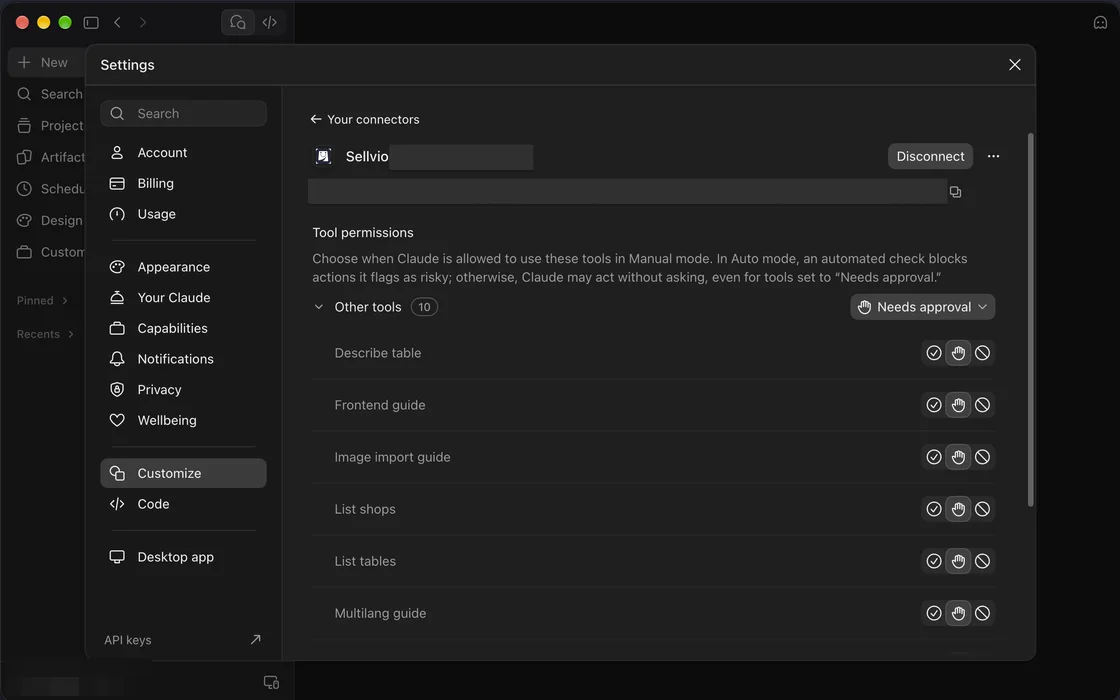
7. Set the permissions. After a successful connection, the list of tools appears (Tool permissions). By default, Claude asks for approval before every action (Needs approval). We recommend keeping this until you get familiar with how it works.
8. Try it out. Start a new conversation, click the + button and check under Connectors that the connector is switched on, then type your first request.
Setup in ChatGPT
In ChatGPT, a custom connector requires a paid plan (Plus, Pro, Business, Enterprise or Edu) and developer mode switched on. Do the setup in your browser at chatgpt.com.
1. Open the settings. Click your profile, then click Settings.
2. Switch on developer mode. Open the Apps & Connectors menu, scroll to the bottom, and under Advanced settings switch on the Developer mode toggle. Approve the warning that appears.
3. Create a new connector. Go back to the Apps & Connectors page and click the Create button.
4. Fill in the form. Enter the connector name you received by email in the Name field, something like your webshop's name in the Description field, and the MCP server address in the Connector URL field; set Authentication to OAuth.
5. Save and connect. Click the Create button, then approve the access on the page that opens. The connector's tools will then appear automatically.
6. Try it out. Start a new conversation and name the connector in your request, for example: “Using the Sellvio connector, look at my orders from last week.” ChatGPT asks for approval before any action that changes data.
On Business, Enterprise and Edu plans, developer mode may first need to be enabled by your workspace administrator. OpenAI occasionally moves these menu items around – if you cannot find one of them, contact our customer support and we will help.
First requests worth trying
- “Show me my webshop's key data and the traffic for the last 30 days.”
- “Which 10 of my products sold best last month?”
- “Write a better product description for this product and show it to me before saving.”
Important things to know
- The connector works on your live webshop. Before any change, always read what the AI is about to do, and only approve what you agree with.
- Every call made through the connector is logged, together with the caller's IP address.
- Use is subject to Sellvio's terms and conditions.
If you get stuck
- You get an error after clicking Connect: check that you pasted the MCP server address without spaces or typos.
- The connector does not appear in the conversation: start a new conversation and check whether it is switched on.
- It still does not work: contact our customer support and tell us which step you got stuck at. A screenshot helps a lot.